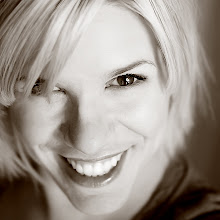
This week's post is brought to us by a guest blogger, Maris Ehlers, of Maris Ehlers Photography. She has some fab ideas and suggestions! I love them!
Here's what she says:
I photograph a lot of women and high school senior girls, so I wanted to focus my Wardrobe Wednesday on something other than clothing, and that is your skin and makeup. Clients tend not to think about it until the last minute, but it can have even more impact on the final image than your clothing.
Getting ready for your session doesn't have to be overwhelming, and you want to look your best, whether it's for a corporate head shot, to celebrate your engagement or with your kids!
Your makeup should look fresh, natural and clean. Here are some easy tips to make sure you look fabulous for your time in front of the lens:
1. Ladies (especially you high school girls), PLEASE no eyeliner on the inside of the eye. I know you've been wearing it this way for years, and I know it looks dramatic and that's how your friends wear theirs, but consider this: it actually makes your eyes look SMALLER. That may be fine in real life, but it can be very distracting and diminish one of your very best features in a portrait. This is my number one rule when photographing women. A softer, slightly smudged line under your lashes will accentuate your eyes, enhance them and make them one of the focal points in your portraits. Eyes are also much easier to edit this way!
2. Nails should always be natural; no polish, clear polish, a French manicure or a very neutral color. Again, bright blues, greens and red take away from your face, especially if you are posed with your head near your hands.
3. Often women think tanning will make them photograph better, when in fact, that is the opposite. Tanning often results in uneven skin color, and it makes editing very difficult for your favorite photographer. Your natural skin color has a luminosity to it that can be amazing in print. Cover it with a tan, fake or by the sun, and not only do we have tan lines to deal with, but your skin can come off as dull and uneven .
4. Faux lashes can make a HUGE difference. There are tons out there now, they are easy to apply and stay on well throughout a session. Even if you just add them at the corners of the eye you can see a big difference in how your eyes pop in a photograph.
5. For a more dramatic look, you can add a lot of drama with some quick makeup tricks. In addition to faux lashes, adding layers of shadow with darker contrast colors in the crease and lid can add dimension and depth to your eyes. Rimming the outside of the eye (under the lower lashes and above the upper lashes) with a darker liner is the way to go. It's tricky though, so make sure you practice before the day of your session - start with a little - you can always add more, but it's nearly impossible to remove it once it's on. Your lips should still not overpower your eyes, so a translucent color is best.
So remember: the goal of a portrait is to accent your natural beauty , and your makeup should enhance what you already have, not bury it! Start conservative, and end with a slightly heavier application to carry over in print, but using tricks like faux lashes, contouring with shadow and blush, as well as a slightly heavier (and lighter) covering of foundation is really all you need. For a little drama, work the eyes - because as well all know, the eyes DO have it!


Loving these ideas! I will be heeding your advice for my family shoot next week! Thank you Maris!


No comments:
Post a Comment